
Stop by here for our library of various eBooks on a variety of weapon related topics. As we find quality documents we will gladly share them here for your education and training purposes.
Click to access 5-Questions-for-Handgun.pdf
Five-step Guide to Handgun Selection – What To Ask When Shopping For A Handgun by Beretta
Click to access 10-CCW-Tips.pdf
Ten Essential Tips For CCW Holders – The Ultimate Guide to CCW Carry by Beretta
![]()
on Aug 6, 2014 11:00:00 AM
Here’s a shooting tip: if you do this one practice routine, you can learn to shoot without missing. Before we get into the secret of how to always hit your target, we need to talk physics.
I know, this is a gun blog, and you never use that high school science stuff anyway. Just hear me out for a minute…
Also see: How to Find A Gun Expert for Real Handgun Training
Almost any handgun, like a Beretta Nano, Beretta 92 series or Beretta Px4 series has less weight than your trigger finger has strength. To go into a little more detail, let’s look at the factory specified weights of a few common handguns:
| Beretta Nano | 1.24 pounds |
| Beretta 92FS | 2.08 pounds |
| Beretta Px4, 9mm | 1.73 pounds |
By now you’re probably thinking, “OK, Tom, that’s a fascinating display of your ability to read the Beretta catalog, but what does that have to do with never missing a target?”
I’m glad you asked! Now, let’s add one more piece of information to that list of gun weights. Now, we’ll consider the weight AND the number of pounds of trigger finger force required to fire the pistol.
| Beretta Nano | 1.24 pounds | 6 to 8 pounds depending on who you ask |
| Beretta 92FS | 2.08 pounds | 12 pounds (first shot) and 5 pounds (subsequent shots) |
| Beretta Px4, 9mm | 1.73 pounds | 12 pounds (first shot) and 4.5 pounds (subsequent shots) |
If we do some fancy math, compare pounds and carry the one, we’ll see that in every case, the force required to break the trigger is more than the weight of the gun. This means that unless you hold the gun perfectly still while applying pressure to the trigger, the gun will move. if the gun moves during the firing sequence, the shot will impact somewhere other than where it was originally aimed.
When you look at it that way, it’s a pretty simple concept. But what do you do about the problem? The answer is easy. You learn how to press (not pull) the trigger without moving the gun. If you learn how to do that, every time, you won’t miss – assuming you have the gun pointed properly at the target.
How do you learn to press the trigger without moving the gun? Dry fire practice. We’ve talked about it tangentially here at Beretta USA a couple of times. Jason shared his dry fire routine and some tips. I mentioned it in an article about the value of practicing with .22s. But we’ve never covered a step by step process on how to dry fire at home without harming yourself, your family or your new love seat from Haverty’s.
Basic dry firing simply allows you to practice pulling the trigger pull on your gun without all that distracting flash and bang. All kidding aside, it’s a way to train your eyes, body and trigger finger to pull the trigger smoothly, without moving the sights off target. The real benefit is that you can do all this without that instinctive flinch when the gun normally goes bang. By conditioning yourself to perform a smooth trigger press, without a flinch reaction, you’ll eventually find that you do the same with a real gun when it does go bang.
The most important consideration is safety. You have to develop your own method that insures that you will never, ever, ever have bullets anywhere near your gun when you dry fire. All four gun safety rules apply when dry firing too:
- Treat your gun as if it’s loaded.
- Keep your finger off the trigger until you’re ready to fire, or even dry fire.
- Never point your gun at anything you’re not willing to destroy.
- Be sure of your target and what’s behind it.
Here’s a dry fire practice checklist:
Step 1: Remove all ammunition from your gun.
Remove the magazine from your gun. Next, rack the slide to remove the cartridge from the chamber. Look in the magazine well and chamber to verify that your gun is truly empty.
Step 2: Move the ammunition away from your practice area.
Humor me here. Get those bullets you just removed and place them out of reach from your practice area. It’s amazing how life’s distractions can cause you to forget you just reloaded your gun after dry fire practice.
Step 3: Choose a safe target and backstop.
Since we’re obeying Rule 1 and treating our gun as if it’s loaded, we need to aim at a safe target and backstop during dry fire practice. I use a dresser that’s backed up against a stairwell wall. If I did manage to launch a bullet at it, the dresser full of junk would stop the projectile.
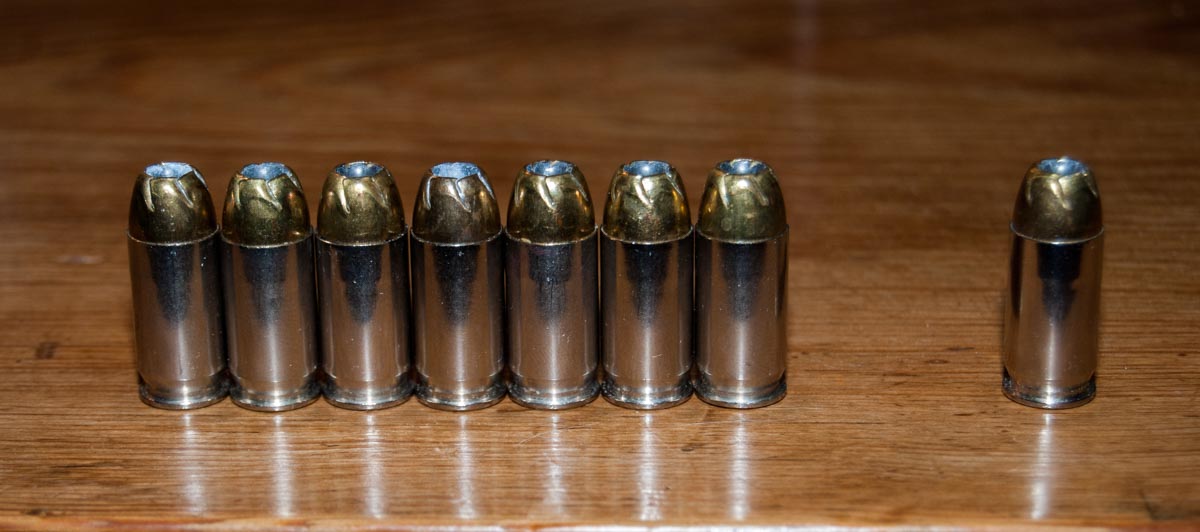
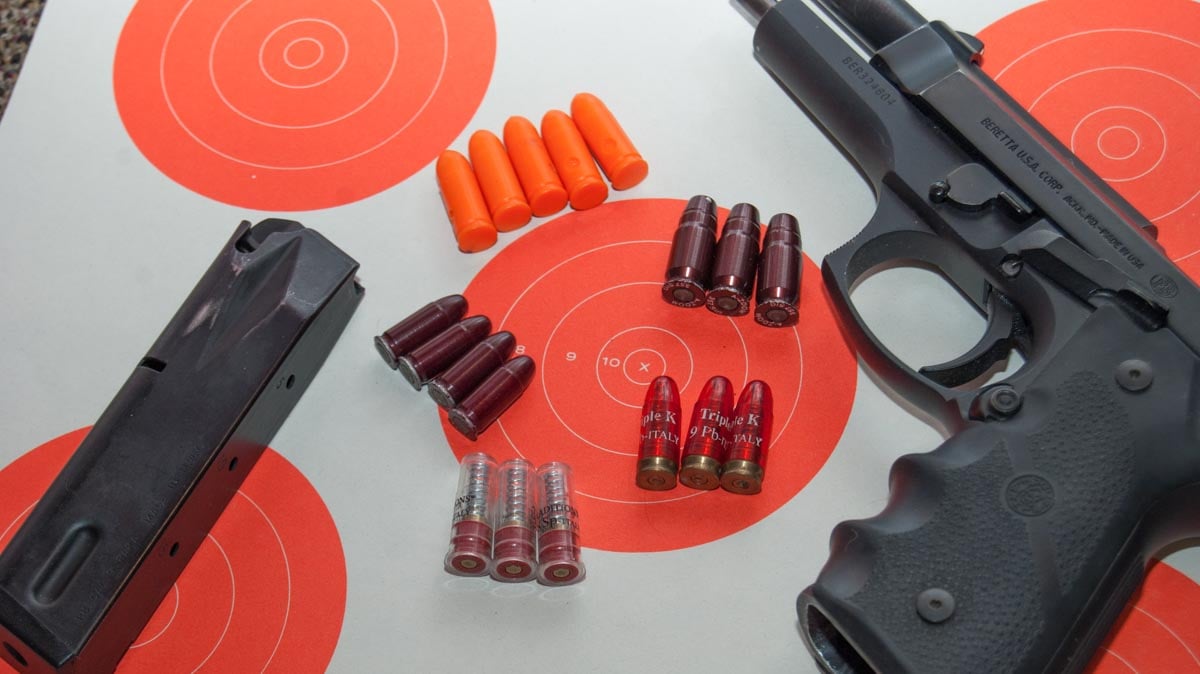
If you line up the ammo from your gun like this near your target, you will have an additional visual cue that your gun is still unloaded.
Here’s a tip that I use. I line up the ammunition I removed from my gun on top of the dresser. I place the rounds from the magazine next to each other and set the round I removed from the chamber a bit off to the side. That’s a visual cue and reminder that all of the bullets from my gun, magazine and chamber, are safely removed.
Step 4: Focus on your front sight!
Focus on your front sight, so it’s crisp and clear. Your chosen (safe!) target will be a bit blurry and that’s OK. You want all of your focus on the front sight. Your sight will move around a bit as no one can hold a handgun perfectly still. This is OK and normal.
Step 5: SLOWLY PRESS the trigger.
Never try to press the trigger quickly the millisecond your sights are where you want them – that leads to moving the gun and a missed shot.
Slowly PRESS the trigger as smoothly as possible while the sight is in the vicinity of your target. As you practice, you be able to hold your gun more steady and the sights will move around less on target. The goal here is to complete the full trigger press until the gun’s action releases – without moving the sights off target. Just accept the little bit of wobble.
You’ll notice I say “press” instead of “pull” and that’s deliberate. If you practice a slow and smooth “press” perfectly every time, your brain will acquire an excellent habit. When at the range, you’ll find that the smooth press is automatic.
Step 6: Follow through!
As the gun dry fires, keep watching the sights until the action is complete. After the gun “clicks”, you’ll want to see the exact same sight picture as before the shot. That’s where your shot would have hit had you been firing a live cartridge. Think of this last step as follow through. Train your eyes to see the sight alignment just after the gun “fires.” Eventually, you’ll know where your shot hit without looking at the target.
Step 7: Reset if necessary depending on your gun type.
Semi-Automatic Pistols (Double / Single-Action)
With a double-action, you can configure your dry fire practice depending on what you want to accomplish. You can always just pull the trigger to simulate a full, double-action firing sequence. However, in real life, after that first double-action trigger pull, your handgun will cock itself so the second shot is a light trigger pull single-action motion. When you’re dry firing, you’ll have to pull back the hammer manually to prepare the gun for a single-action shot. It’s up to you if you want to simulate a first double-action shot, followed by a series of single-action shots or some other scenario. Do practice double-action shots, immediately followed by single-action shots though. The transition from heavier to lighter trigger takes some getting used to.
Striker-Fired Pistols
If you’re shooting a constant action striker-fired pistol, you’ll have to cock the gun after each shot. To do this, just rack the slide. Fortunately, you don’t have to do a complete slide rack. With most pistols, you can pull the slide back ¼” or so and the striker mechanism will reset. Experiment with your gun to see how little of a partial slide rack you can get away with.
Step 8: Make a deliberate show of being done.
When you are finished, reload your gun with the ammunition you moved earlier. Now here’s the most important part – immediately store your gun in its normal place – holster, safe or lockbox. People have dry firing accidents when they reload their gun, get distracted, then resume “dry firing” only to experience a loud bang.
Those are the basic steps of safe and effective dry fire practice. In a future article, we’ll talk about other practice steps you can add to your dry fire routine.
One more thing. Always check with your gun manufacturer documentation to make sure your gun is safe to dry fire. Some guns, like most .22s, should not be dry fired. Most centerfire pistols are OK though.
Remember, do everything slowly, deliberately and perfectly. You are programming your brain so each action has to be exactly the same. Your brain will speed things up on its own when necessary. Brains are really smart like that.
![]()

on Aug 5, 2014 8:48:00 AM
You’ve been carrying on with your handgun training at the range regularly, and you finally have a good grasp of the fundamentals of shooting. Your grip is solid, you have the basics of sight alignment down and your point of aim is almost always your point of impact.
Also see:
Congratulations! You’re on the right track to becoming truly proficient with your handgun, but you’ve still got more to learn. Once you’re comfortable with the fundamentals, it’s time to move on to the next level and start practicing some intermediate to advanced skills. Here is a short list of skills that will greatly benefit casual handgun enthusiasts and are a must for those carrying or thinking of getting involved in competitive shooting.
Drawing from a Holster
Being able to safely and quickly draw from a holster is an absolutely essential skill for those who carry or are thinking about getting involved in competitive shooting. Learning to draw through dry fire practice will allow you to develop the feel of a smooth, consistent draw without the dangers that come with working with a live handgun. This is also a great opportunity to check your equipment to find out if the holster you’ve chosen has any shortcomings. With dry fire practice, you can get your issues figured out before you move to working with a loaded gun. If you carry concealed, make sure to practice drawing with your concealment clothing on, though I would strongly recommend learning to draw out without them on first.
Once you’ve got the feel for drawing from the holster during dry fire practice, move on to the range and practice drawing and firing at a specific location on a target. If you’re not hitting what you’re aiming at, you’ll need to slow down and make sure you’re draw is smooth AND your shot is on target.
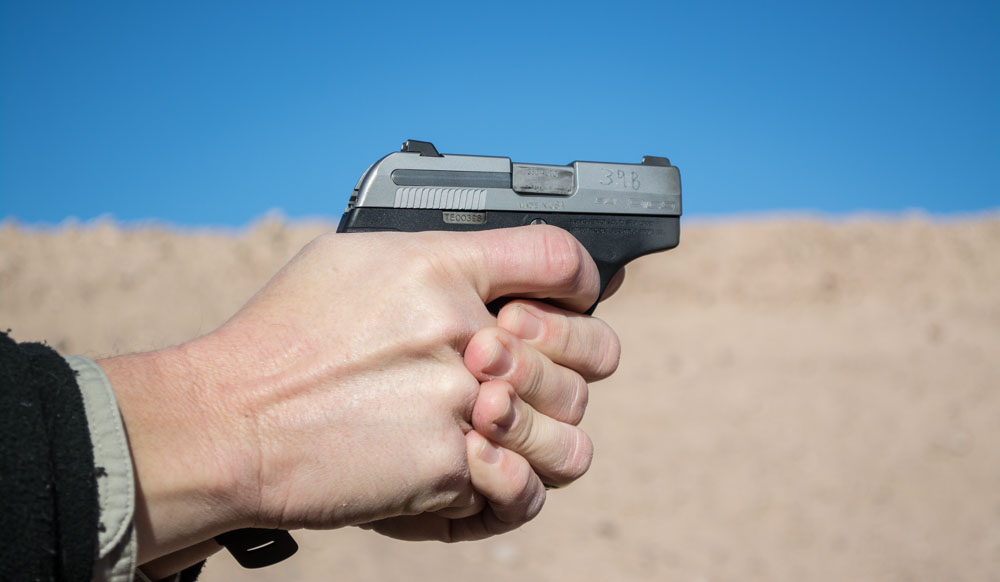
Shooting Without Seeing Your Sights
This is important self-defense skill is often overlooked, but it’s important to at least get a feel for shooting accurately at close distances without bringing the gun sights up to your eyes. In some forms of competitive shooting, it’s referred to as “shooting from retention”, and requires holding your arm next to your body and shooting from the hip. The first time I shot from retention, I brought my elbow too far in front of my body and punched myself in the stomach, which was quite surprising and unpleasant. It’s an awkward position to shoot in and care has to be taken to make sure all of your body parts are behind the muzzle at all times. It’s important to practice this skill before you end up in a situation where you have no choice but to fire without seeing your sights.
Clearing Malfunctions
I don’t know anyone that enjoys dealing with malfunctions while shooting, but it is part of the reality of owning and operating a handgun. Many malfunctions that you will encounter with your handgun can be cleared using similar techniques, and “tap, rack, bang” will quickly become your friend. When you break it down the mechanics of it, malfunction clearing is a 2-part process – first, you need to be able to identify what is causing the problem, and second, you need to know which technique to use to clear the malfunction.
Reloading
I know what you’re thinking, “I already know how to load my magazine with ammo, that’s easy!” This is the other kind of reloading; changing your magazines while either shooting or on the move. If you carry or are going to shoot competitively, practice by hitting your magazine release, grabbing another magazine off your belt, inserting another magazine into your gun, then firing at least one shot at a target. If you don’t have a magazine pouch to wear on your hip, practice by grabbing a magazine off a table. As with any other skill, the most important part of learning to reload safely is making sure you keep your finger off the trigger and the gun stays pointed in a safe direction.
Practicing your reloads can be done easily in dry fire practice, just remember that all the basic safety rules apply when you are working with your gun. Always triple-check your gun to make sure it is not loaded before engaging in any dry fire practice.
These skills are by no means an exhaustive list, but they are a few of the most important handgun skills you should be proficient in, whether you carry, compete or just plink at the range. Don’t feel the need to go it alone; if you’re not sure where to get started, contact a skilled trainer to help you learn these skills correctly and safely. Then, it’s up to you to motivate yourself to practice them until you can repeat them successfully at will.


Recent Comments